
こんな方におすすめ
- Shopifyでテーマカスタマイズしたい人
- Shopifyでカートページをカスタマイズする方法

はじめに
Shopifyオリジナルテーマを作成しよう、の第8回は「カートページの作成」です。
下の画像のようなページを作成します。
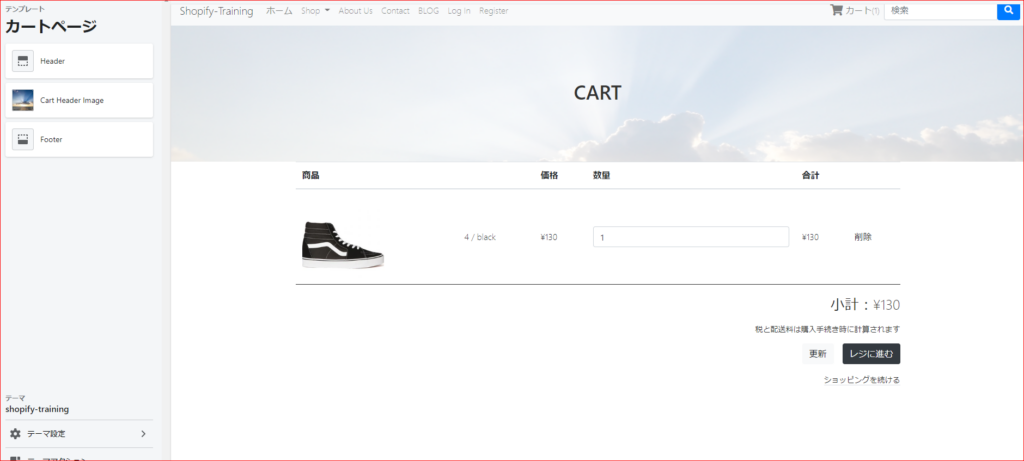
商品の表示、数量の変更、削除、合計金額の表示
などの基本的な機能を付けることが可能です。
今回のコードは下記リンクにまとめてあるので参考にしてみてください。(branch:no10)
また、今回のテーマのもとのhtmlは第1回の記事に公開してあるので、そちらからダウンロードをお願いします。
カートページを作成しよう
デフォルトテンプレートの解説
まずは、デフォルトのテンプレートのコードを解説していきます。
templatesフォルダのcart.liquidを開いてください。
{% if cart.item_count > 0 %}
  <h1>cart</h1>
  <form action="/cart" method="post" novalidate>
    <table>
      <thead>
        <th colspan="2">Prod</th>
        <th>Price</th>
        <th>Qty</th>
        <th>total</th>
      </thead>
      <tbody>
        {% for item in cart.items %}
          <tr>
            <td>
              <a href="{{ item.url | within: collections.all }}">
                <img src="{{ item | img_url: 'medium' }}" alt="{{ item.title | escape }}">
              </a>
            </td>
            <td>
              <a href="{{ item.url }}">{{ item.product.title }}</a>
              {{ item.variant.title }}
              <a href="/cart/change?line={{ forloop.index }}&quantity=0">remove</a>
            </td>
            <td>{{ item.price | money }}</td>
            <td>
              <input type="number" name="updates[]" id="updates_{{ item.key }}" value="{{ item.quantity }}" min="0">
            </td>
            <td>
              {% if item.original_line_price != item.line_price %}{{ item.original_line_price | money }}{% endif %}
              {{ item.line_price | money }}
              {% for discount in item.discounts %}{{ discount.title }}{% endfor %}
            </td>
          </tr>
        {% endfor %}
      </tbody>
    </table>
    <div>
      <p>sub total : {{ cart.total_price | money }}</p>
      <button type="submit" name="update">Update</button>
      <button type="submit" name="checkout">Checkout</button>
    </div>
  </form>
{% else %}
  <h2>cart</h2>
  Cart is empty
{% endif %}
上から解説していきます。
- {% if cart.item_count > 0 %}・・・中身があれば表示、なければ「Cart is empty」を表示
- <form action="/cart" method="post" novalidate>・・・カート内のフォームは基本的にこのコードでOK
- {% for item in cart.items %}・・・カートの商品はcart.itemsで取り出す
- {{ item.url | within: collections.all }}・・・商品のURL
- {{ item | img_url: 'medium' }}・・・商品の画像
- {{ item.title }}・・・商品の名前、数、バリエーションを表示
- {{ item.product.title }}・・・商品のタイトルを表示
- {{ item.variant.title }}・・・商品のバリエーションを表示
- href="/cart/change?line={{ forloop.index }}&quantity=0"・・・このコードで商品をカート内から削除。
詳しく説明すると{{ forloop.index }}はループの回数番目の番号を取ってこれるので、その商品の個数が0になるリンクへ飛ばすことができる - <input type="number" name="updates[]" id="updates_{{ item.key }}" value="{{ item.quantity }}" min="0">・・・これと「update」ボタンを組み合わせることで商品の数をカート内で変更できる
- item.original_line_price・・・商品の割引前の値段を表示。この部分のif文は
割引があったら→割引前と割引後の値段を表示
割引がなかったら→割引前のみ表示 - {% for discount in item.discounts %}{{ discount.title }}{% endfor %}・・・割引分を順に表示
for文なのは、複数の割引(季節セールと、クーポンセールみたいな)に対応するため - {{ cart.total_price | money }}・・・合計金額(割引後)を表示
- button type="submit" name="update">Update・・・name="update"とすることでアップデートできる
- button type="submit" name="checkout">Checkout・・・name="checkout"でチェックアウトのページへ
これで解説を終了します。
詳しくはページ下部に参考文献を載せてあるので参考にしてみてください。
独自デザインに変更
それではデフォルトの機能を残したまま、オリジナルのデザインに変更しましょう。
cart.liquidの中身を下記コードに変更してください。
{% section 'cart-header' %}
{% render 'breadcrumbs' %}

{% if cart.item_count > 0 %}
<div class="main">
  <div class="container">
    <form action="/cart" method="post" novalidate>
      <table class="table cart_table">
        <thead>
          <tr>
            <th scope="col">商品</th>
            <th scope="col"></th>
            <th scope="col">価格</th>
            <th scope="col">数量</th>
            <th scope="col">合計</th>
            <th scope="col"></th>
          </tr>
        </thead>
        <tbody>
          {% for item in cart.items %}
          <tr>
            <th scope="col"><a href="{{ item.url | within: collections.all }}">
                <img src="{{ item | img_url: 'medium' }}" alt="{{ item.title | escape }}"
                  class="cover_img cart_product_img">
              </a></th>
            <td><a href="{{ item.url | within: collections.all }}">{{ item.variant.title }}</a></td>
            <td>{{ item.price | money }}</td>
            <td>
              <input type="number" class="form-control" name="updates[]" id="updates_{{ item.key }}"
                value="{{ item.quantity }}" min="0"></td>
            <td>{% if item.original_line_price != item.line_price %}{{ item.original_line_price | money }}{% endif %}
              {{ item.line_price | money }}
              {% for discount in item.discounts %}{{ discount.title }}{% endfor %}</td>
            <td><a href="/cart/change?line={{ forloop.index }}&quantity=0" class="delete_button">削除</a></td>
          </tr>
          {% endfor %}
        </tbody>
      </table>
      <div class="text-right">
        <p class="f26">小計:{{ cart.total_price | money }}</p>
        <p class="f14">税と配送料は購入手続き時に計算されます</p>
      </div>
      <div class="d-flex">
        <button type="submit" class="ml-auto mr-3 btn btn-light" name="update">更新
        </button>
        <button type="submit" class="btn btn-dark" name="checkout">レジに進む
        </button>
      </div>
      <div class="text-right mt-3">
        <a href="/" class="f14 border-bottom">ショッピングを続ける</a>
      </div>
    </form>
  </div>
</div>
{% else %}
<h2>cart</h2>
Cart is empty
{% endif %}
カートの部分は新しく学ぶ部分はありません。
それでは、トップの画像を貼るためにsectionsフォルダにcart-header.liquidを作成し、下記コードを貼り付けてください。
<div class="subpage_bg_img d-flex justify-content-center align-items-center" style="background-image: url('{{section.settings.cart_header_image | img_url: '1920x'}}');">
  <h2 class="f36">CART</h2>
</div>

{% schema %}
{
  "name":"Cart Header Image",
  "settings":[
     {
        "type":"image_picker",
        "id":"cart_header_image",
        "label":"Cart Header Image"
     }
  ]
}
{% endschema %}
この部分も今までのxxxx-header.liquidと変わりませんので、解説は省略します。
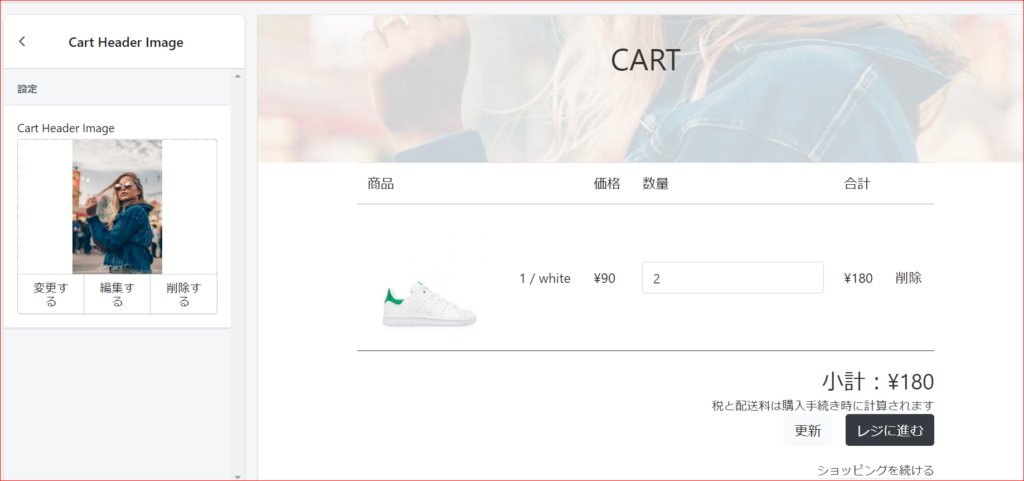
表示することができました。
また、「レジに進む」を押すとチェックアウトページに移動します。
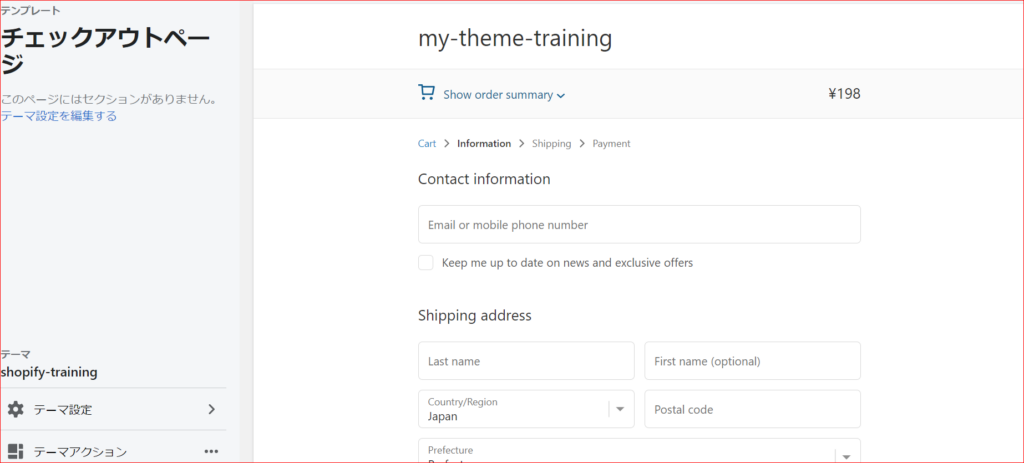
チェックアウトページは「Shopify Plus」のプランに入ると編集可能になります。
そのため、現在はこのデフォルトのままで行きます。
まとめ
今回はカートページの作成を行いました。
今回のコードは下記リンクにまとめてあるので参考にしてみてください。(branch:no10)
なお、質問や要望がありましたら、お問い合わせフォームまたはコメント欄によろしくお願いします。
次回はブログページを作成していきます。
参考文献
cart.liquidについての概要
https://shopify.dev/docs/themes/theme-templates/cart-liquid
cartの情報取得
https://shopify.dev/docs/themes/liquid/reference/objects/cart
ページ一覧
全体像の確認
https://agata-code.com/programming/original-no1/
開発環境のセット
https://agata-code.com/programming/original-no2/
ヘッダーの作成
https://agata-code.com/programming/original-no3/
フッターの作成
https://agata-code.com/programming/original-no4/
トップページの作成
https://agata-code.com/programming/original-no5/
Aboutページの作成
https://agata-code.com/programming/original-no6/
お問い合わせフォームの作成
https://agata-code.com/programming/original-no7/
コレクションページの作成
https://agata-code.com/programming/original-no8/
個別商品ページの作成
https://agata-code.com/programming/original-no9/
カートページの作成
https://agata-code.com/programming/original-no10/
ブログの作成
https://agata-code.com/programming/original-no11/
ログイン機能の実施