こんな方におすすめ
- Shopifyでテーマカスタマイズしたい人
- Shopifyで商品ページを作成したい人
- 関連商品を表示したい人
はじめに
Shopifyオリジナルテーマを作成しよう、の第9回は「個別商品ページの作成」です。
下の画像のようなページを作成します。
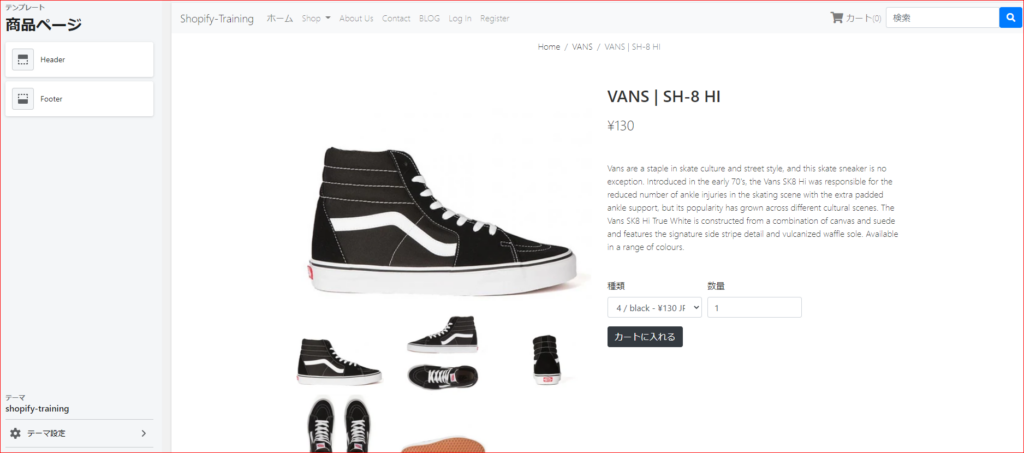
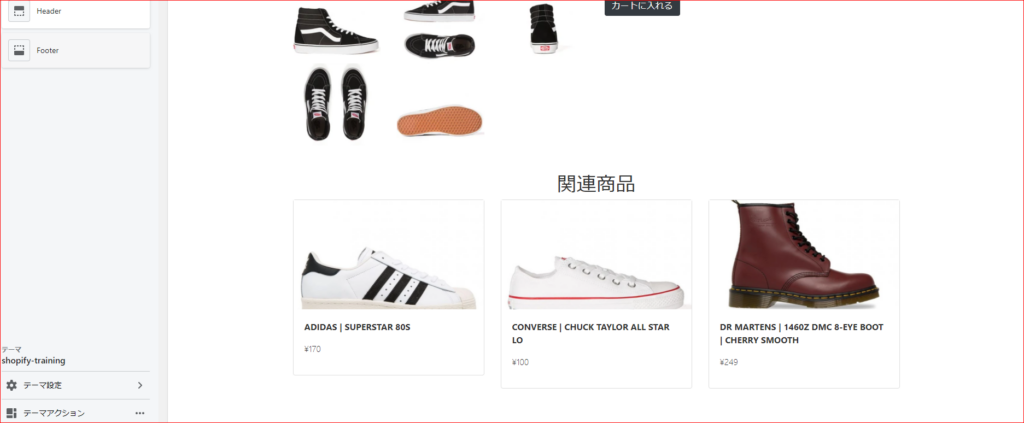
今回の学習を通して学べることは主に以下の2つです。
- 商品ページの作成方法
- 関連商品の表示方法
今回のコードは下記リンクにまとめてあるので参考にしてみてください。(branch:no9)
また、今回のテーマのもとのhtmlは第1回の記事に公開してあるので、そちらからダウンロードをお願いします。
個別商品ページを作成しよう
デフォルトテンプレートの解説
まず、デフォルトの解説から行います。
Shopifyの個別商品ページは「templates\product.liquid」で編集できます。
デフォルトでは下記コードが入っています。
{% assign current_variant = product.selected_or_first_available_variant %}
{% assign featured_image = current_variant.featured_image | default: product.featured_image %}
<img src="{{ featured_image | img_url: 'large' }}" alt="{{ featured_image.alt | escape }}" id="ProductPhotoImg">
{% for image in product.images %}
  <a href="{{ image.src | img_url: 'large' }}">
    <img src="{{ image.src | img_url: 'compact' }}" alt="{{ image.alt | escape }}">
  </a>
{% endfor %}
<h1>{{ product.title }}</h1>
<form action="/cart/add" method="post" enctype="multipart/form-data" id="AddToCartForm">
  <select name="id" id="productSelect">
    {% for variant in product.variants %}
      {% if variant.available %}
        <option value="{{ variant.id }}">
          {{ variant.title }} - {{ variant.price | money_with_currency }}
        </option>
      {% else %}
        <option disabled="disabled">
          {{ variant.title }} - sold out
        </option>
      {% endif %}
    {% endfor %}
  </select>
  {{ current_variant.price | money }}
  <label for="Quantity">quantity</label>
  <input type="number" id="Quantity" name="quantity" value="1" min="1">
  <button type="submit" name="add" id="AddToCart">Add to cart</button>
</form>
<div>{{ product.description }}</div>
上から順に解説していきます
- {% assign current_variant = product.selected_or_first_available_variant %}・・・選択したバリエーション、または一番上のバリエーションを変数に格納します
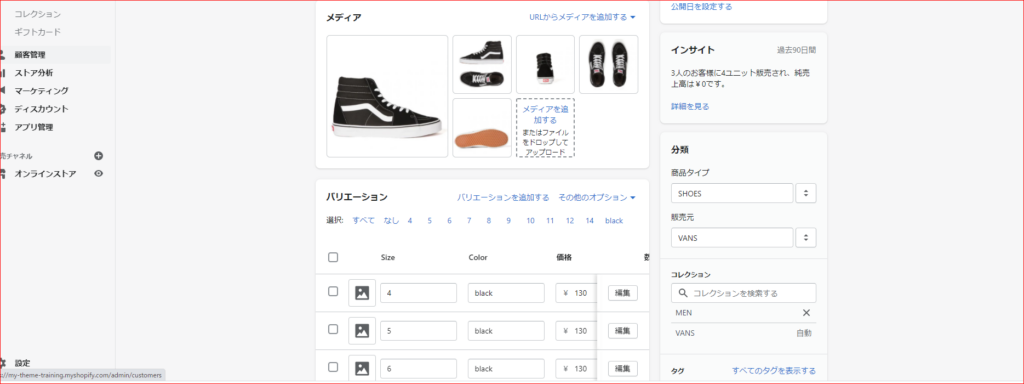
このように商品には色やサイズなど種類がたくさんあるため、現状態ではこの一番上のバリエーションを表示するよ、という意味です。
- {% assign featured_image = current_variant.featured_image | default: product.featured_image %}・・・現在のバリエーションの画像(デフォルトでは一番上の画像)を表示するよ、というものです。
もし、青色の靴の写真が用意されていて、バリエーションが「blue」だったら、その写真が表示されるよ、と言うものです。
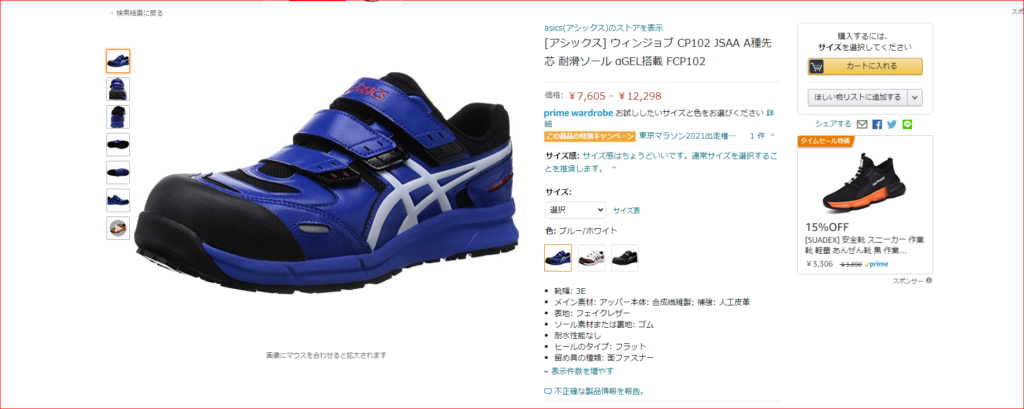
上記画像のようになります。
- {% for image in product.images %}・・・商品の画像を順番に表示します
- {{ product.title }}・・・商品のタイトル
- <form action="/cart/add" method="post" enctype="multipart/form-data" id="AddToCartForm">・・・これをformタグに指定することで、カートにデータを送ることができます。
基本的にはこのコードで問題ありません - selectの中は以下の通りです
<!-- セレクトボックスの設置 -->
  <select name="id" id="productSelect">
    <!-- バリエーションを1つずつ取り出す -->
    {% for variant in product.variants %}
    <!-- バリエーションがあったら、id,title,priceを取得 -->
      {% if variant.available %}
        <option value="{{ variant.id }}">
          {{ variant.title }} - {{ variant.price | money_with_currency }}
        </option>
      {% else %}
      <!-- バリエーションがなかったらsold out を表示 -->
        <option disabled="disabled">
          {{ variant.title }} - sold out
        </option>
      {% endif %}
    {% endfor %}
</select>- {{ current_variant.price | money }}・・・現在のバリエーションの値段を表示
- <input type="number" id="Quantity" name="quantity" value="1" min="1">・・・数量を入力
- {{ product.description }}・・・商品詳細
このようになっています。
それでは、この機能を活かして、独自デザインに変更します。
独自デザインに修正
product.liquidを下記コードに書き換えてください。
{% render 'breadcrumbs' %}
{% assign current_variant = product.selected_or_first_available_variant %}
{% assign featured_image = current_variant.featured_image | default: product.featured_image %}
<div class="main">
  <div class="container">
    <div class="row mb-5">
      <div class="col-sm">
        <img src="{{ featured_image | img_url: 'large' }}" alt="{{ featured_image.alt | escape }}" alt=""
          class="product_big_img">
        <div class="row row-cols-sm-3 mt-3">
          {% for image in product.images %}
          <div class="col">
            <img src="{{ image.src | img_url: 'compact' }}" alt="{{ image.alt | escape }}" class="product_small_img">
          </div>
          {% endfor %}
        </div>
      </div>
      <div class="col-sm">
        <h2 class="mb-3 f30">{{ product.title }}</h2>
        <p class="f26">{{ current_variant.price | money }}</p>
        <p class="my-5">{{ product.description }}</p>

        <form action="/cart/add" method="post" enctype="multipart/form-data" id="AddToCartForm">
          <div class="form-row">
            <div class="form-group col-md-4">
              <label for="id">種類</label>
              <select name="id" id="productSelect" class="form-control">
                {% for variant in product.variants %}
                {% if variant.available %}
                <option value="{{ variant.id }}">
                  {{ variant.title }} - {{ variant.price | money_with_currency }}
                </option>
                {% else %}
                <option disabled="disabled">
                  {{ variant.title }} - sold out
                </option>
                {% endif %}
                {% endfor %}
              </select>
            </div>
            <div class="form-group col-md-4">
              <label for="number">数量</label>
              <input type="number" id="Quantity" name="quantity" class="form-control" value="1" min="1">
            </div>
          </div>
          <button type="submit" name="add" id="AddToCart" class="mx-auto btn btn-dark">カートに入れる</button>
        </form>
      </div>
    </div>
  </div>
</div>
デフォルトのコードのデザインのみを変えた感じになります。
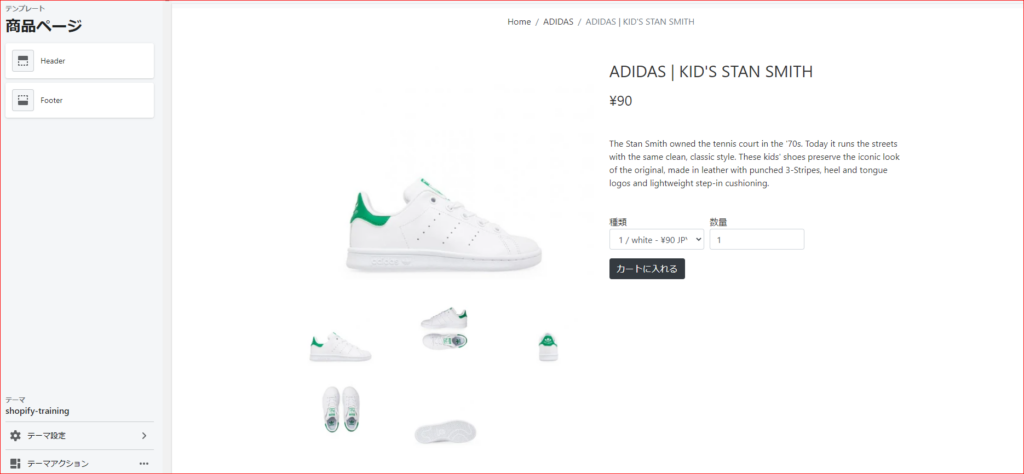
このように表示することができました。
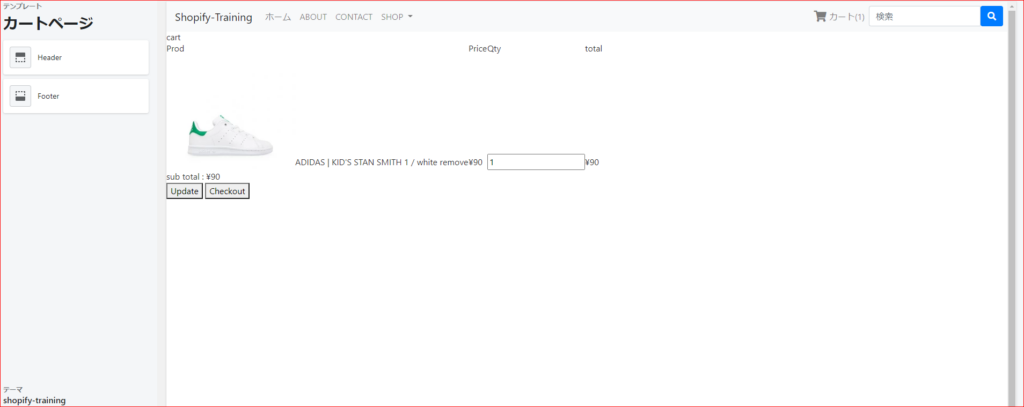
カートにも追加することができました。
関連商品の表示
続いて関連商品の表示をしてみます。
Shopifyでは商品のコレクション一覧を下記コードで取得することができます。
{% for collection in product.collections %}今回は、次のような感じでその商品と同じコレクションの商品を取得してみようと思います。
- その商品のコレクションを全て取得
- その複数のコレクションをfor文で1つずつ取り出す
- そのコレクションの商品を3つ取得(paginate)で制限
- ひとつのコレクションの商品を取得し終わったらbreakで抜けて終了
それでは下記コードを貼り付けてください。
<div class="main">
  <div class="container">
    <div class="row mb-5">
      <!-- 中略 -->
    </div>
    <h3 class="f36 text-center">関連商品</h3>
    <div class="row row-cols-sm-3">
      {% for collection in product.collections %}
        {% paginate collection.products by 3 %}
          {% for product in collection.products %}
            <a href="{{product.url | within: collection}}" class="col-sm mb-3">
              <div class="card position-relative">
                {% unless product.available %}<span class="f26 sold_out text-danger position-absolute">Sold
                  Out</span>{% endunless %}
                <img class="item_list_img" src="{{product.featured_image.src | img_url: '1920x'}}" alt="">
                <div class="card-body">
                  <p class="card-text font-weight-bold">{{product.title}}</p>
                  <p>{{product.price | money}}</p>
                </div>
              </div>
            </a>
          {% endfor %}
        {% endpaginate %}
        {% break %}
      {% endfor %}
    </div>
  </div>
</div>
複雑に見えますが、中のこの部分はコレクションページで商品を表示したときと同じです。
{% paginate collection.products by 3 %}
          {% for product in collection.products %}
            <a href="{{product.url | within: collection}}" class="col-sm mb-3">
              <div class="card position-relative">
                {% unless product.available %}<span class="f26 sold_out text-danger position-absolute">Sold
                  Out</span>{% endunless %}
                <img class="item_list_img" src="{{product.featured_image.src | img_url: '1920x'}}" alt="">
                <div class="card-body">
                  <p class="card-text font-weight-bold">{{product.title}}</p>
                  <p>{{product.price | money}}</p>
                </div>
              </div>
            </a>
          {% endfor %}
{% endpaginate %}
そのコレクションを外側のforで1つずつ取り出しているだけです。
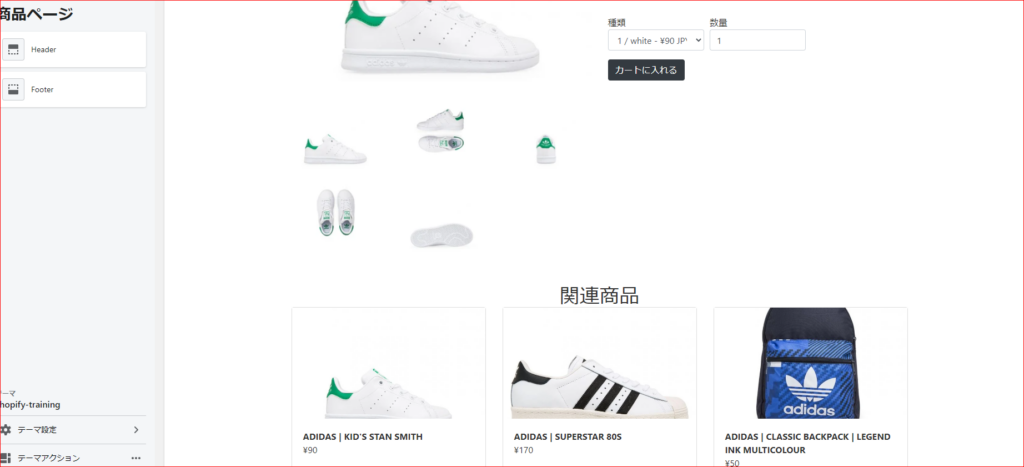
表示することができました。
まとめ
今回は主に以下の2つの学習をしました。
- 商品ページの作成方法
- 関連商品の表示方法
今回のコードは下記リンクにまとめてあるので参考にしてみてください。(branch:no9)
なお、質問や要望がありましたら、お問い合わせフォームまたはコメント欄によろしくお願いします。
次回は商品のカートページを作成していきます。
参考文献
product.liquidの概要
https://shopify.dev/docs/themes/theme-templates/product-liquid
商品情報の取得方法
https://shopify.dev/docs/themes/liquid/reference/objects/product
ページ一覧
全体像の確認
https://agata-code.com/programming/original-no1/
開発環境のセット
https://agata-code.com/programming/original-no2/
ヘッダーの作成
https://agata-code.com/programming/original-no3/
フッターの作成
https://agata-code.com/programming/original-no4/
トップページの作成
https://agata-code.com/programming/original-no5/
Aboutページの作成
https://agata-code.com/programming/original-no6/
お問い合わせフォームの作成
https://agata-code.com/programming/original-no7/
コレクションページの作成
https://agata-code.com/programming/original-no8/
個別商品ページの作成
https://agata-code.com/programming/original-no9/
カートページの作成
https://agata-code.com/programming/original-no10/
ブログの作成
https://agata-code.com/programming/original-no11/
ログイン機能の実施
